|
|
Post by Pokahpolice on Mar 31, 2014 17:08:45 GMT -5
|
|
|
|
Post by Pokahpolice on Mar 31, 2014 17:52:44 GMT -5
So I decided to take an old Power Compact fixture I had and make it into a hood/fixture. It worked out awesome! Tore all the old crap out, used existing brackets to secure the heatsink for the LEDs, then added a small plastic box to hold the driver board and the Arduino. Drilled a few holes for wires and cleaned everything up. 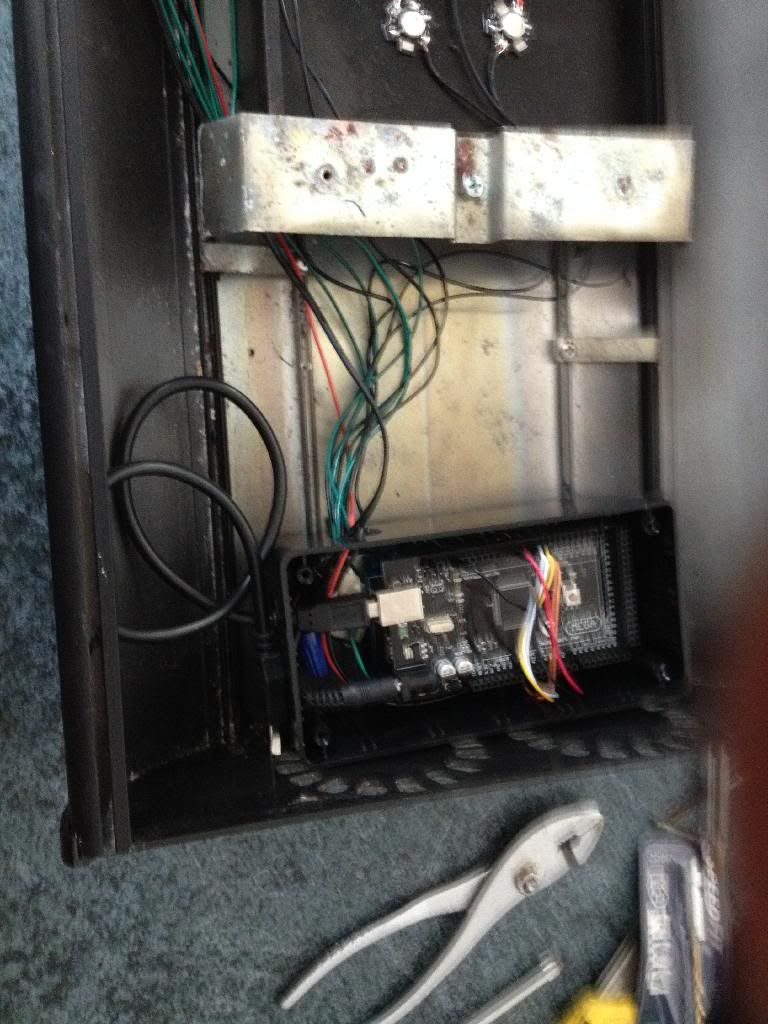 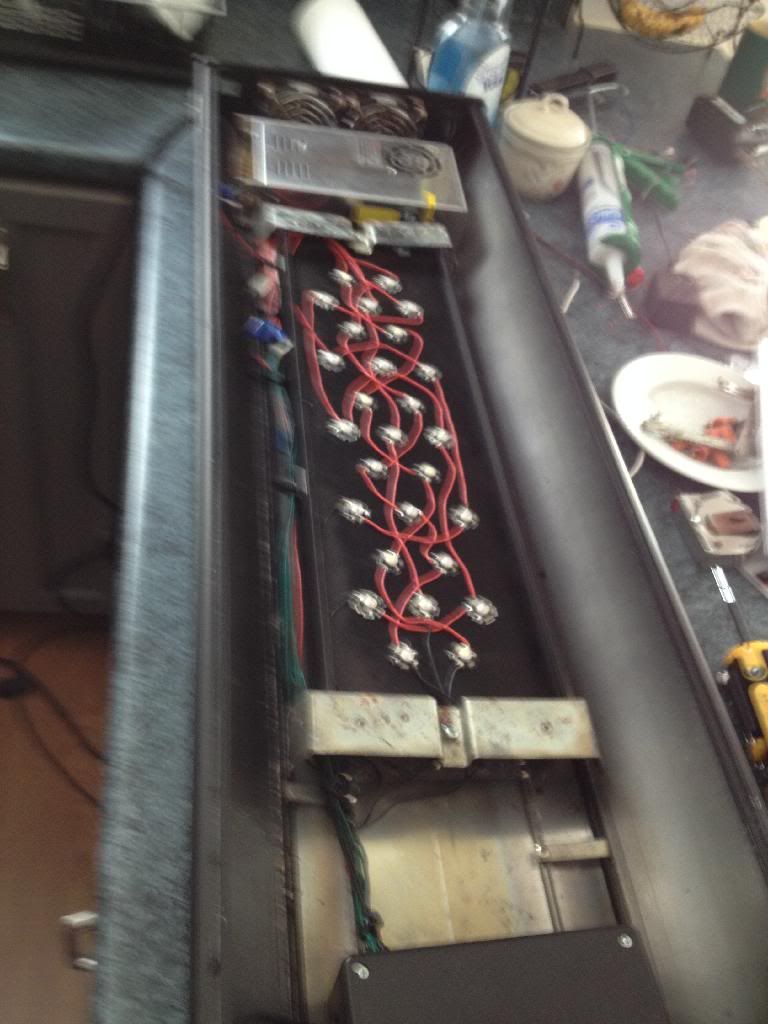 I then took the reflector and cut a hole for the LEDs and one for the fan on the power source. 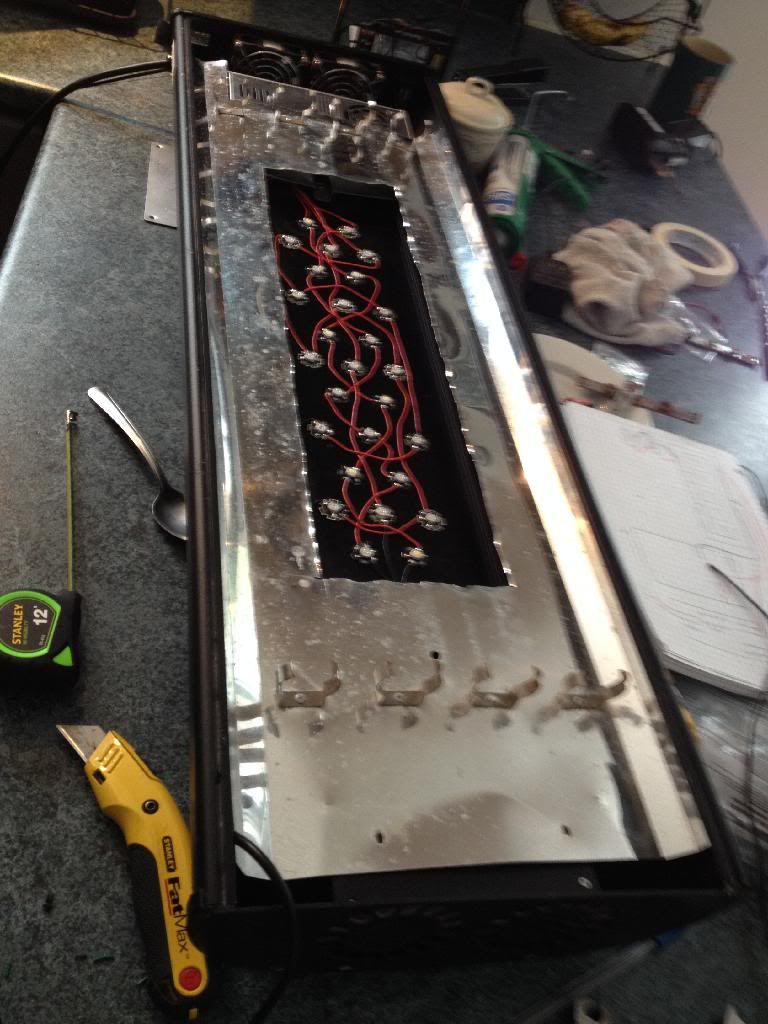 Now, I'm almost done. I'm going to take the T5s out of the fixture over my tank now and add them as well. 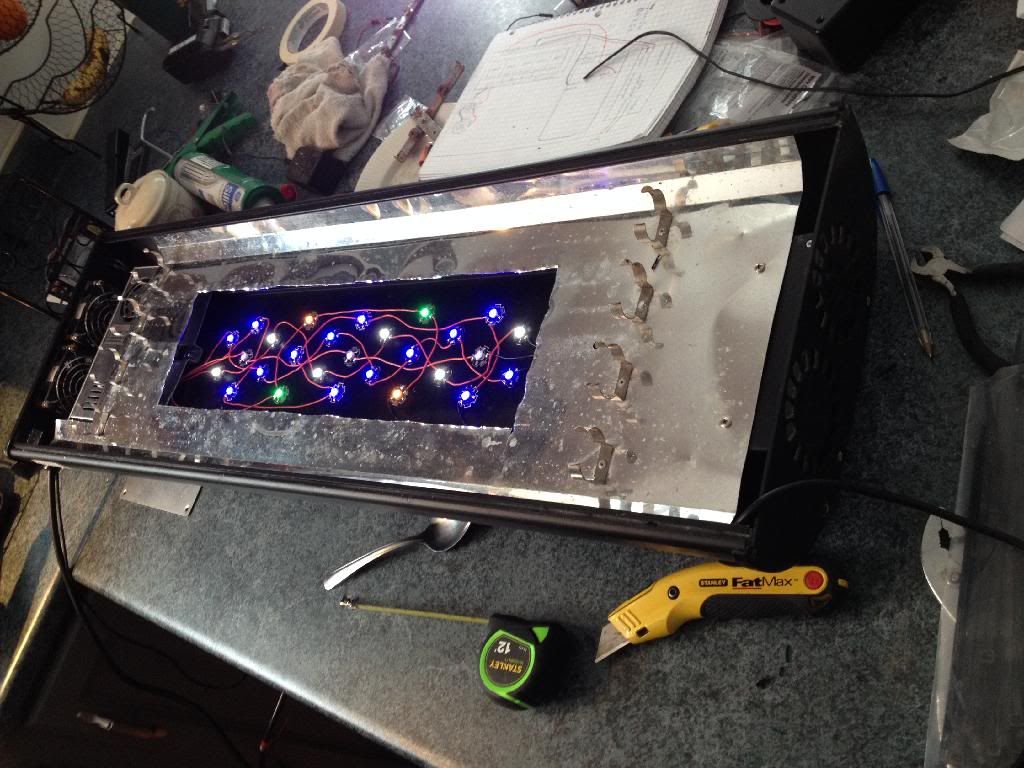 |
|
|
|
Post by foggman on Mar 31, 2014 21:25:20 GMT -5
Looks good, I would be nervious to have my arduino over the water. I didn't realize they were drivers, it's a nice looking set up
|
|
|
|
Post by Pokahpolice on Apr 1, 2014 5:50:50 GMT -5
Looks good, I would be nervious to have my arduino over the water. I didn't realize they were drivers, it's a nice looking set up If you don't put the Arduino over the water you will need to run a wire for each color/string you want to control and a ground wire...in my case that would have been 6 wires coming from the light to the Arduino plus a plug for the power source. Under the stand puts it back over the water. On a wall you have a mess of wires and lets face it theses are not show pieces. As you can see in the picture I put it in a sealed box under the reflector. I also ran a USB cable so I can plug in the laptop without taking it apart. |
|
|
|
Post by foggman on Apr 1, 2014 6:04:05 GMT -5
That makes sence
|
|
|
|
Post by jasonandsarah on Apr 1, 2014 6:12:32 GMT -5
Very nice! You taking orders when your done?  |
|
|
|
Post by Pokahpolice on Apr 1, 2014 7:17:00 GMT -5
Very nice! You taking orders when your done?  Thanks and no...:-) but if you want to build one let me know and I'll help you through it. These days it's cheaper to just buy one. |
|
|
|
Post by Pokahpolice on Apr 1, 2014 20:21:22 GMT -5
Did a bit more work on the Arduino controller today. I added a RTC (Real Time Clock) which then allowed me to write some code based on time. 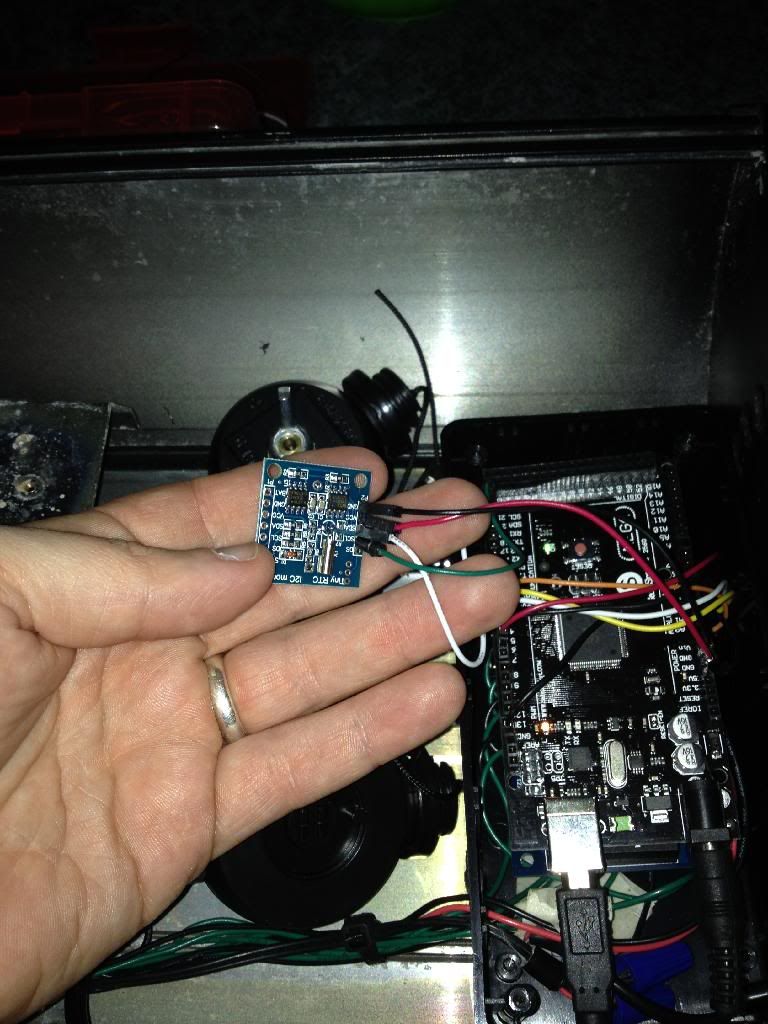 I've been diving into the code piece of the Arduino for the last few hours. I was able to get a simple fade in and fade out program written (mostly stolen from others and re-written to work on my fixture). If any of you are following this and are interested in the code here you go... /*
Arduino LED controller for reef aquariums
// paramterized LED lighting control for reef aquariums
// use a DS1307 RTC to kick off lighting schedules
// fade up on a given slope
// delay a set amount
// fade back down
// such that the photoperiod lasts the correct amount of time
// Circuit
//
// PWM pins described below connected to dimming circuits on drivers
// grounds from drivers connected to arduino ground
// DS1307 RTC connected via I2C
//
//
//
*/
// Pins to control LEDs. Change these if you're using different pins.
int b1Led = 6; // LED PWM channel for blues
int b2Led = 5; // LED PWM channel for blues string 2
int wLed = 4; // LED PWM channel for whites
int uvLed = 3; // LED PWM channel for UV
int gLed = 2; // LED PWM channel for Green/Orange
// Set up RTC
#include "Wire.h"
#define DS1307_I2C_ADDRESS 0x68
// RTC variables
byte second, rtcMins, oldMins, rtcHrs, oldHrs, dayOfWeek, dayOfMonth, month, year;
// Other variables. These control the behavior of lighting. Change these to customize behavoir
int minCounter = 0; // counter that resets at midnight. Don't change this.
int b1StartMins = 480; // minute to start blues. Change this to the number of minutes past midnight you want the blues to start.
int b2StartMins = 480; // minute to start blues string 2
int wStartMins = 510; // minute to start whites
int uvStartMins = 420; // minute to start UV.
int gStartMins = 510; // minute to start greens and orange
int b1PhotoPeriod = 720; // photoperiod in minutes blues. Change this to alter the total photoperiod for blues.
int b2PhotoPeriod = 720; // photoperiod in minutes blues string 2.
int wPhotoPeriod = 510; // photoperiod in minutes whites.
int uvPhotoPeriod = 800; // photoperiod in minutes UV.
int gPhotoPeriod = 510; // photoperiod in minutes greens and orange.
int fadeDuration = 60; // duration of the fade on and off for sunrise and sunset. Change this to alter how long the fade lasts.
int b1Max = 200; // max intensity for blues. Change if you want to limit max intensity.
int b2Max = 200; // max intensity for blues string 2.
int wMax = 180; // max intensity for whites
int uvMax = 190; // max intensity for UV
int gMax = 100; // max intensity for greens and orange
/****** LED Functions ******/
/***************************/
//function to set LED brightness according to time of day
//function has three equal phases - ramp up, hold, and ramp down
void setLed(int mins, // current time in minutes
int ledPin, // pin for this channel of LEDs
int start, // start time for this channel of LEDs
int period, // photoperiod for this channel of LEDs
int fade, // fade duration for this channel of LEDs
int ledMax // max value for this channel
) {
if (mins > start && mins <= start + fade) {
analogWrite(ledPin, map(mins - start, 0, fade, 0, ledMax));
}
if (mins > start + period && mins <= start + period - fade) {
analogWrite(ledPin, ledMax);
}
if (mins > start + period - fade && mins <= start + period) {
analogWrite(ledPin, map(mins - start + period - fade, 0, fade, ledMax, 0));
}
}
/***** RTC Functions *******/
/***************************/
// Convert normal decimal numbers to binary coded decimal
byte decToBcd(byte val)
{
return ( (val/10*16) + (val%10) );
}
// Convert binary coded decimal to normal decimal numbers
byte bcdToDec(byte val)
{
return ( (val/16*10) + (val%16) );
}
// 1) Sets the date and time on the ds1307
// 2) Starts the clock
// 3) Sets hour mode to 24 hour clock
// Assumes you're passing in valid numbers.
void setDateDs1307(byte second, // 0-59
byte minute, // 0-59
byte hour, // 1-23
byte dayOfWeek, // 1-7
byte dayOfMonth, // 1-28/29/30/31
byte month, // 1-12
byte year) // 0-99
{
Wire.beginTransmission(DS1307_I2C_ADDRESS);
Wire.write(0);
Wire.write(decToBcd(second));
Wire.write(decToBcd(minute));
Wire.write(decToBcd(hour));
Wire.write(decToBcd(dayOfWeek));
Wire.write(decToBcd(dayOfMonth));
Wire.write(decToBcd(month));
Wire.write(decToBcd(year));
Wire.endTransmission();
}
// Gets the date and time from the ds1307
void getDateDs1307(byte *second,
byte *minute,
byte *hour,
byte *dayOfWeek,
byte *dayOfMonth,
byte *month,
byte *year)
{
Wire.beginTransmission(DS1307_I2C_ADDRESS);
Wire.write(0);
Wire.endTransmission();
Wire.requestFrom(DS1307_I2C_ADDRESS, 7);
*second = bcdToDec(Wire.read() & 0x7f);
*minute = bcdToDec(Wire.read());
*hour = bcdToDec(Wire.read() & 0x3f);
*dayOfWeek = bcdToDec(Wire.read());
*dayOfMonth = bcdToDec(Wire.read());
*month = bcdToDec(Wire.read());
*year = bcdToDec(Wire.read());
}
void setup() {
// init I2C
Wire.begin();
}
/***** Main Loop ***********/
/***************************/
void loop() {
// get time from RTC and put in hrs and mins variables
getDateDs1307(&second, &rtcMins, &rtcHrs, &dayOfWeek, &dayOfMonth, &month, &year);
minCounter = rtcHrs * 60 + rtcMins;
// determine if it is day or night, and act accordingly
if ((minCounter > b1StartMins || minCounter > b2StartMins || minCounter > wStartMins || minCounter > uvStartMins || minCounter > gStartMins)
&& (minCounter < b1StartMins + b1PhotoPeriod || minCounter < b2StartMins + b2PhotoPeriod || minCounter < wStartMins + wPhotoPeriod || minCounter < uvStartMins + uvPhotoPeriod || minCounter < gStartMins + gPhotoPeriod))
{
// set LED states
setLed(minCounter, b1Led, b1StartMins, b1PhotoPeriod, fadeDuration, b1Max);
setLed(minCounter, b2Led, b2StartMins, b2PhotoPeriod, fadeDuration, b2Max);
setLed(minCounter, wLed, wStartMins, wPhotoPeriod, fadeDuration, wMax);
setLed(minCounter, uvLed, uvStartMins, uvPhotoPeriod, fadeDuration, uvMax);
setLed(minCounter, gLed, gStartMins, gPhotoPeriod, fadeDuration, gMax);
}
else { //night
analogWrite(b1Led, 0);
analogWrite(b2Led, 0);
analogWrite(wLed, 0);
analogWrite(uvLed, 0);
analogWrite(gLed, 0);
}
// Get ready for next iteration of loop
delay(1000);
} |
|
|
|
Post by Pokahpolice on Apr 1, 2014 20:26:24 GMT -5
LOL...so the 'insert code' function on this site doesn't work correctly
|
|
|
|
Post by foggman on Apr 2, 2014 6:01:16 GMT -5
Lol I am looking at modifying the typhon code on my build
|
|
|
|
Post by Pokahpolice on Apr 2, 2014 6:06:27 GMT -5
Lol I am looking at modifying the typhon code on my build You said you had a copy of that code correct. Can you PM me a copy? I'd like to take a look at it. Thanks |
|
|
|
Post by foggman on Apr 2, 2014 18:38:17 GMT -5
pm sent tried to post but doesnt work well |
|
|
|
Post by Pokahpolice on Apr 2, 2014 21:33:17 GMT -5
Thanks for sharing.
That code is crazy long! Modifying it is going to be a daunting task. Personally I think it's poorly written. I've seen code with weather patterns included that were shorter. If written correctly there is no need for separate 'if' statements to set each channel. The same thing could have been accomplished with a comma in the first statement and adding the channel. This code is super redundant and doesn't need to be.
If it works for your needs than its great but modifying it is going to be hard...maybe not hard but certainly time consuming.
|
|
|
|
Post by ryansweatt2004 on Apr 2, 2014 22:04:19 GMT -5
Updated photo of the tank. I have a little life so far. 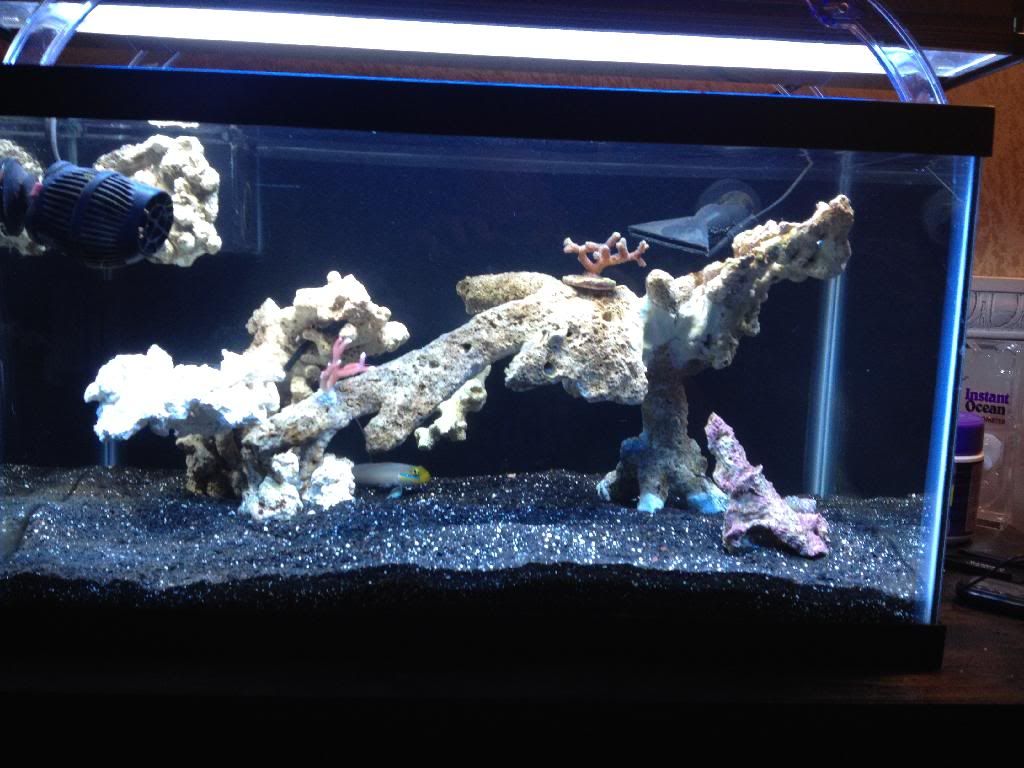 Tank is looking good, just a word of caution, you may end up regretting the yellow headed sleeper goby though. They get 7+ inches long and are known for dusting corals and making a mess out of tanks. |
|
|
|
Post by Pokahpolice on Apr 3, 2014 7:24:55 GMT -5
Tank is looking good, just a word of caution, you may end up regretting the yellow headed sleeper goby though. They get 7+ inches long and are known for dusting corals and making a mess out of tanks. I had it for three days and got rid of it. It was an impulse buy and I know better! |
|